You are here: ILT > Adding an ILT Calendar to a LearnCenter Page
Adding an ILT Calendar to a LearnCenter Page
You can add an ILT Calendar to any LearnCenter page or the Left Nav Bar. This calendar enables Users to see what ILT events are upcoming and enables them to enroll in them directly from the calendar (if you have enabled that option).
- Log in to LearnCenter using your Administrator credentials.
- Locate the Management Control section in the Left Nav Bar.
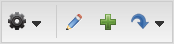
- Click
 to place LearnCenter in Edit Mode.
- Add a new page to LearnCenter.
or
Click  and use the drop-down list to locate and select the page.
or
Locate the area on the Left Nav Bar to which you want to add the calendar.
- Click Insert New Area Here.

- Click the ILT calendar button on the WYSIWYG Editor.
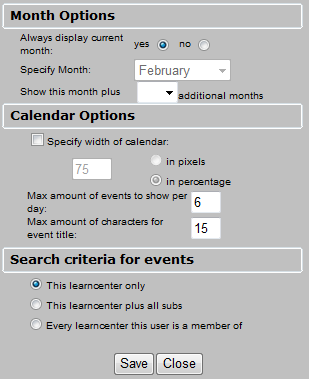
- Click one of the following for the month display:
- Yes - to display the current month. (Default).
- No - to display a month of your choosing. If you select this option, the Specify Month field becomes available and you can select the month you want to always display on your calendar.
- Select a number from the drop-down list if you want to show additional months.
- Click the Specify width of calendar check box if you want to set a specific size for your calendar. (By default, the calendar is set to 75 percent.) When you select this check box, the size box and the in pixels and in percentage options buttons become available. You can determine the size of your calendar based on pixels or percentage by selecting the appropriate option button.
- Type the Maximum amount of events to show per day. (Default is 6.)
- Type the Maximum amount of characters for the event title. (Default is 15.)
- Select one of the following to determine how your calendar displays:
- This LearnCenter only (Default)
- This LearnCenter plus all subs (sub LearnCenters)
- Every LearnCenterthis User is a member of.
- Click Save. The calendar displays on the page or Nav Bar.
Using the ILT Calendar
Users can enroll in ILT Enrollments directly from the calendar if you have enabled this option when creating the Enrollment. In the following example, the month tabs show this calendar is set up to display the month of February plus two additional months.
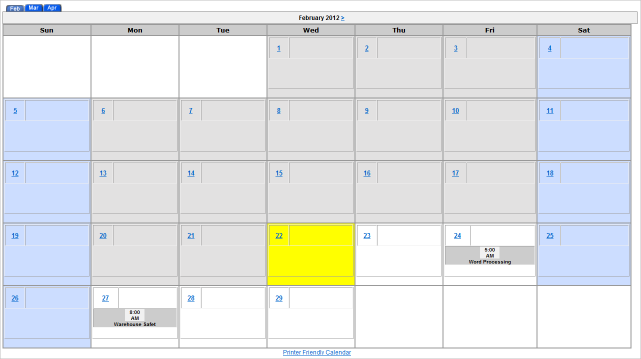
Click the month tabs at the top of the calendar or > and < next to display a different month. To view more information about an event on a particular date:
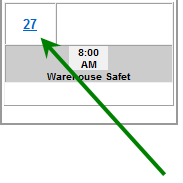
- Click the hyperlink for the date of the event you are interested in.
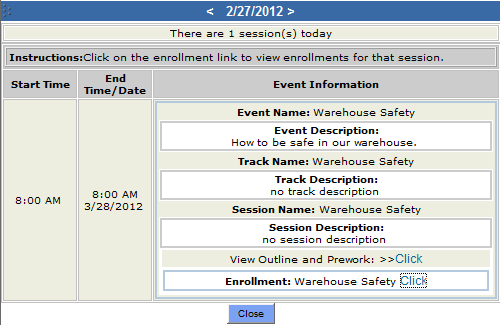
- Click the Click link next to View Outline and Prework to view information about either for the Enrollment. A window opens displaying this information if it was entered by an Enrollment Admin. Users can print this information if they want to.
- Click the Click link or links in the Enrollment section for that event to enroll or view additional information for the Enrollment such as Prerequisites, Credits, or Roster.
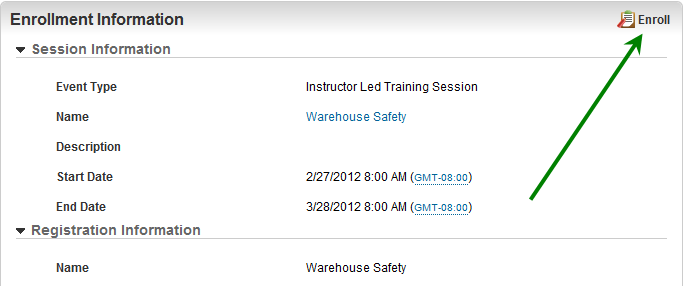
- Click Enroll. If a User is already scheduled for another enrollment at the same time, the Schedule Conflicts window opens and displays the conflicting Enrollment. Click Close to close the window.
Depending on how Users accessed the ILT calendar, they may be prompted to type their Username and Password. If your LearnCenter has the Self Registration feature activated, Users will notice the fields for registering on this pop-up window as well.

|
If you have no use for self-registration, is recommended that you do not set this functionality to prevent Users from inadvertently changing the Username and password you have assigned to them. |
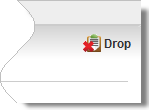
Once Enrolled, the Enroll button changes to a Drop button (if you have enabled the ability for Users to drop when you created the Enrollment).
You can also send a message to the Enrollment Admin directly from this window by clicking  next to manager’s name in the Admin Contacts section.

 Related Topics

Copyright © 2010-2015, Oracle and/or its affiliates. All rights reserved.